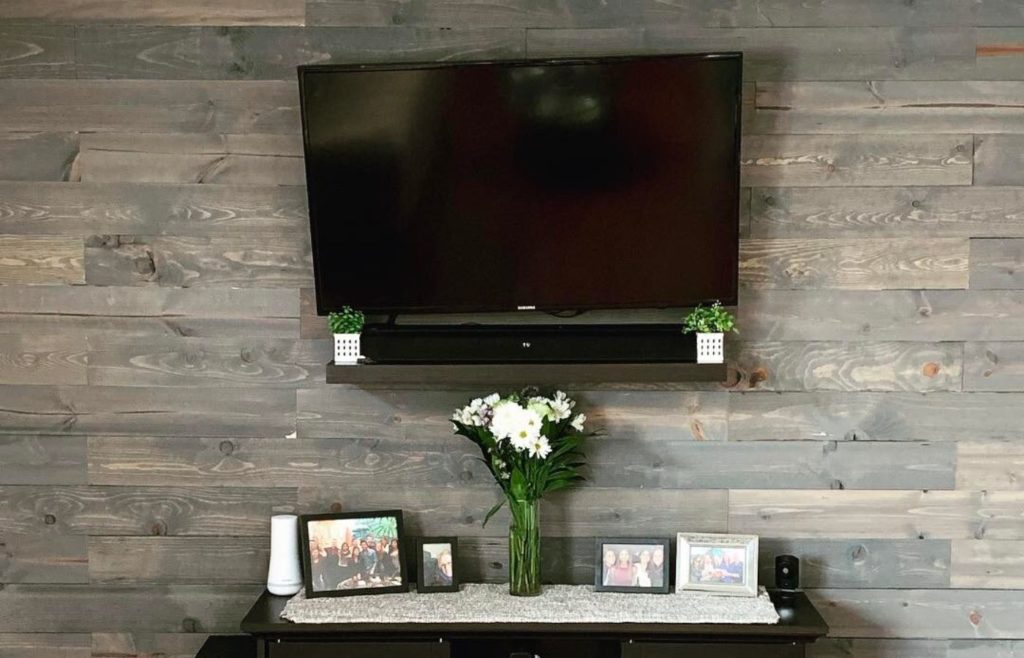
Accent walls add an element of design and personality without overwhelming the entire room.
Are you someone with commitment issues? Do you like to switch up the interior look of your home often? Maybe you like a paint color but you’re not sure how it will translate on all 4 walls of a room? Are you scared of committing to a color in general? The answer to all of these questions is utilizing an accent wall in your design.
I’m someone who personally has not been able to stand the sight of all white walls for as long as I can remember. I always viewed the room as unfinished or the house having no personality. I have to tell you, my opinion is changing and evolving more than ever in recent years.
I LOVE dark colors for a bedroom and bright colors that spark creativity in my office space. I tend to keep the common areas more neutral, especially with an open floor plan. I bring in more texture or color through accessories to give the space some personality.
In my current home I decided to add an accent wall in my living room. It was so much of the same and such a long and narrow room, it needed something to draw the eye to the other end. I went back and forth on painting it a color and decided that I wanted some texture on the wall to really draw the eye in and help warm up the space. I started and completed this project in one afternoon. It was super easy!

I used these wood planks from Home Depot in the gray finish. They were a great price ($49.97 per package of 6 planks). I did a lot of research and there were some peel-and-stick options but they were pretty pricey. This was the most affordable option with an easy application process that I could do on my own.
The Process
The process is simple, start with one board in the center at the top of the wall and build outwards and downwards. Be careful it is level, as the rest of your wood pieces will build off of this one. Trim pieces to fit as you go. You will need to trim the pieces that are bordering the corners from other walls and the pieces touching the ceiling and floor. My advice is to save the trimming for last. To begin, place as many whole pieces as you can to gain some momentum and then begin trimming to fit and filling in the gaps. You can have a very patterned look or more random, whatever fits your style!


I also love a great textured wallpaper or adding some wood paneling to a space to warm it up and give it an edge. It is tough in Colorado to utilize wallpaper or the square wood paneling look shown in the examples below since most of the walls are textured here. I’m hoping to use this design technique in my next home! It adds modern sophistication while also being classic. It’s the perfect backdrop for a dining room, office, or a headboard behind your bed.
Like I said before, if color or commitment to an entire room of color scares you, start small. Start with one wall. When done well, one wall can be all the impact you need to make a room feel “complete”. Below are some image to get you inspired!


