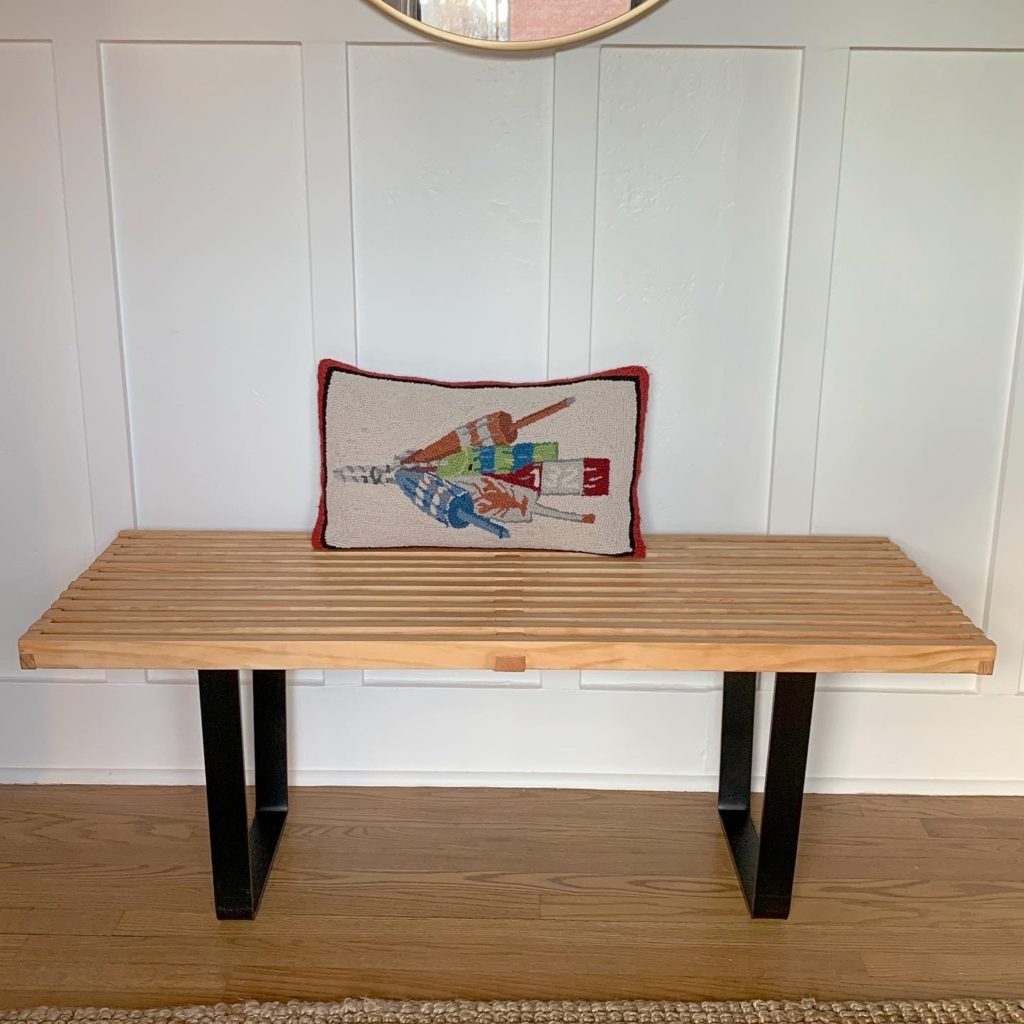
The furniture throughout the house is mid-mod so we wanted to keep with that style when thinking through bench options. Ryan really liked the benches we came across with wooden slats and they seemed really possible to recreate. I’ve built a few tables and benches so far so I thought I could handle it. Although, the joints are more complicated than I’ve taken on before…
Materials:
- 8 – 1×2 8ft boards
- 1 – 2×2 8ft board
- Wood Glue
- Circular Saw or Table Saw
- Hand Saw or Jig Saw
- Nail Gun (optional)
- Chisel
- Tape Measurer
- Pencil
- Satin/Polyurethane
- Bench Legs
Cost:
The average cost to purchase a bench like this is $350.
We built a replica for $150!
Process:
- I started by measuring and cutting 12 1×2 boards to 47’“ with my Miter Saw. These will serve as the seat of the bench.
- Cut 2 1×2’s to 24” – These will serve as your short end pieces. You want them to be a little longer than your bench depth in the event you make some mistakes notching, you can continue to use the same board and not have to start over.
- Cut a 2×2 to 24” as well. This will serve as your middle support piece
- On your 12 1×2’s – Clamp your 1x2s together and measure 3/4’“ in from each edge and mark a line. Mark the middle of the boards at 23.5” and mark 3/4” on either side of that. We want a 1.5” section that we will notch out so our 2×2 support piece will fit in.
- Use a circular saw to first cut along your 3/4” line in on each edge. Then make several passes from that towards the edge. You’ll use a chisel to knock out the slivers of wood so you have a 3/4” notch on each side. (Make sure you adjust the height of your circular saw cut to be 3/4”)
- Then repeat this step for the 1.5” section in the middle of your 12 boards.
- For your end pieces and the 2×2, you’ll mark every 3/4” for your 12 boards and 3/4” space between each board.
- Cut out every other 3/4” space with your circular saw using the same technique as before. Cut along each borderline and then make several passes through the space you’ll be notching out. Use your chisel to remove the pieces of wood. This takes some patience but having an actual chisel speeds this up immensely! I got a set of 3 from Home Depot for $10.
- Once all your boards are cut and notches chiseled, do a dry fit to make sure your pieces line up and fit together well.
- Next apply glue in the notches and put together this puzzle of a bench!
- I added nails through the back of the bench on the end pieces and middle support piece for more stability, but the original plans I found relied solely on the glue.
- I put weights on the 3 cross pieces overnight to keep the boards flat on the ground while the glue dried.
- You’ll want to saw off the extra of the 2 end pieces and the middle support.
- Once glue is dried, start sanding! I would start with an 80 grit, move to 120 grit, and finish off with 220 for a really smooth finish. You want all your edges smooth and feel free to fill in any gaps with wood filler for a professional looking finish.
- After sanding is complete, wipe off all of the dust and apply your finish. You may choose to highlight the natural beauty of the wood and apply a clear polyurethane to protect the wood, or apply a stain and poly.
- Let the stain and/or poly dry and then attach your legs.
- I attached metal ones I purchased online but to keep costs even lower, you can definitely add wooden legs that will still leave a mid-mod overall look.
- For a more visual way to follow along with the steps, check my Highlight on my instagram @yourhomespotential titled Slat Bench


